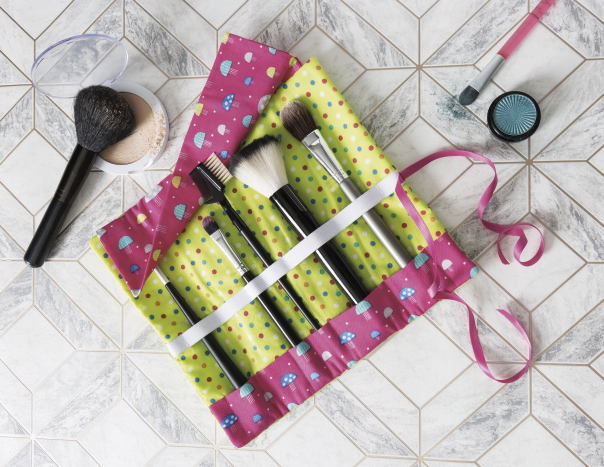
Ready to roll
Keep your make-up tools and brushes stored safely in this simple-to-make roll that’s perfect for holidays or trips away. The roll will take about an hour to sew.
You will need
Two fat quarters of fabric
27cm x 23cm piece of wadding/batting
28cm length of 12mm-wide elastic
60cm length of 1cm-wide ribbon
Point turner or chopstick
Fabric marker pen and ruler
Size: 24cm x 21cm unrolled
Note: use a 6mm seam allowance throughout unless stated otherwise
Preparation
From the first fat quarter (green fabric), cut the following:
Two 26.5cm x 23cm pieces.
From the second fat quarter (pink fabric), cut the following:
24cm x 15cm strip for the top ‘flap’ section.
26.5cm x 10cm strip for the bottom ‘pocket’ section.
To make up
1 To create the top flap, fold the 24cm x 15cm strip in half lengthways, right sides together. Sew each short side edge, with a 6mm seam allowance. Trim corners at an angle, turn through and press.
2 To make the bottom pocket, fold the 26.5cm x 10cm strip in half lengthways, wrong sides together, and press.
3 Place the wadding under one 26.5cm x 23cm main piece and centre the top flap section on the right side of the fabric, aligning the top raw edge with the raw edge of the main piece. Stitch in place along the top edge, with a 6mm seam allowance. Follow a similar process to sew the bottom pocket. Stitch along bottom raw edge only.
4 Measure 13cm down from the top edge, then draw
a line across the front. Place the elastic along this line, then pin in place at each side edge. Stitch elastic ends close to the fabric edges to fix elastic in place.
5 Slip make-up tools under the elastic, then mark and pin as needed to create channels. Stitch vertically down the elastic, through all layers, to create the channels.
6 Using marker pen and ruler, mark stitching lines on to the bottom pocket piece to create pockets parallel to your brush and tool channels. Stitch vertically down the marked lines through all layers, with a 3mm stitch length.
7 Fold the ribbon in half, then place and pin the fold on the right-hand side edge over the elastic, with the ribbon tails in towards the fabric. Stitch the fold in place close to the edge. Pin ribbon tails together in the middle of the fabric panel to keep them away from the side seams.
8 Place the remaining 26.5cm x 23cm piece on top of the roll front, right sides together. Stitch outside edges, with a 1cm seam allowance, leave a turning gap approx 8cm in the side edge opposite the ribbon. Trim seams and corners at an angle, turn through and push out corners with a point turner or chopstick. Press with all the seams on the very edge. Hand-sew the opening closed with slip stitch to complete.
Take Two Fat Quarters: Gifts by Wendy Gardiner (RRP £9.99, available from searchpress.com)
OFFER: Free P&P for Candis readers (UK only) – enter CANDISGIFT at checkout

Leave a Reply
Please login or register to leave a comment.