Bluebell Wood – Parisienne Blue
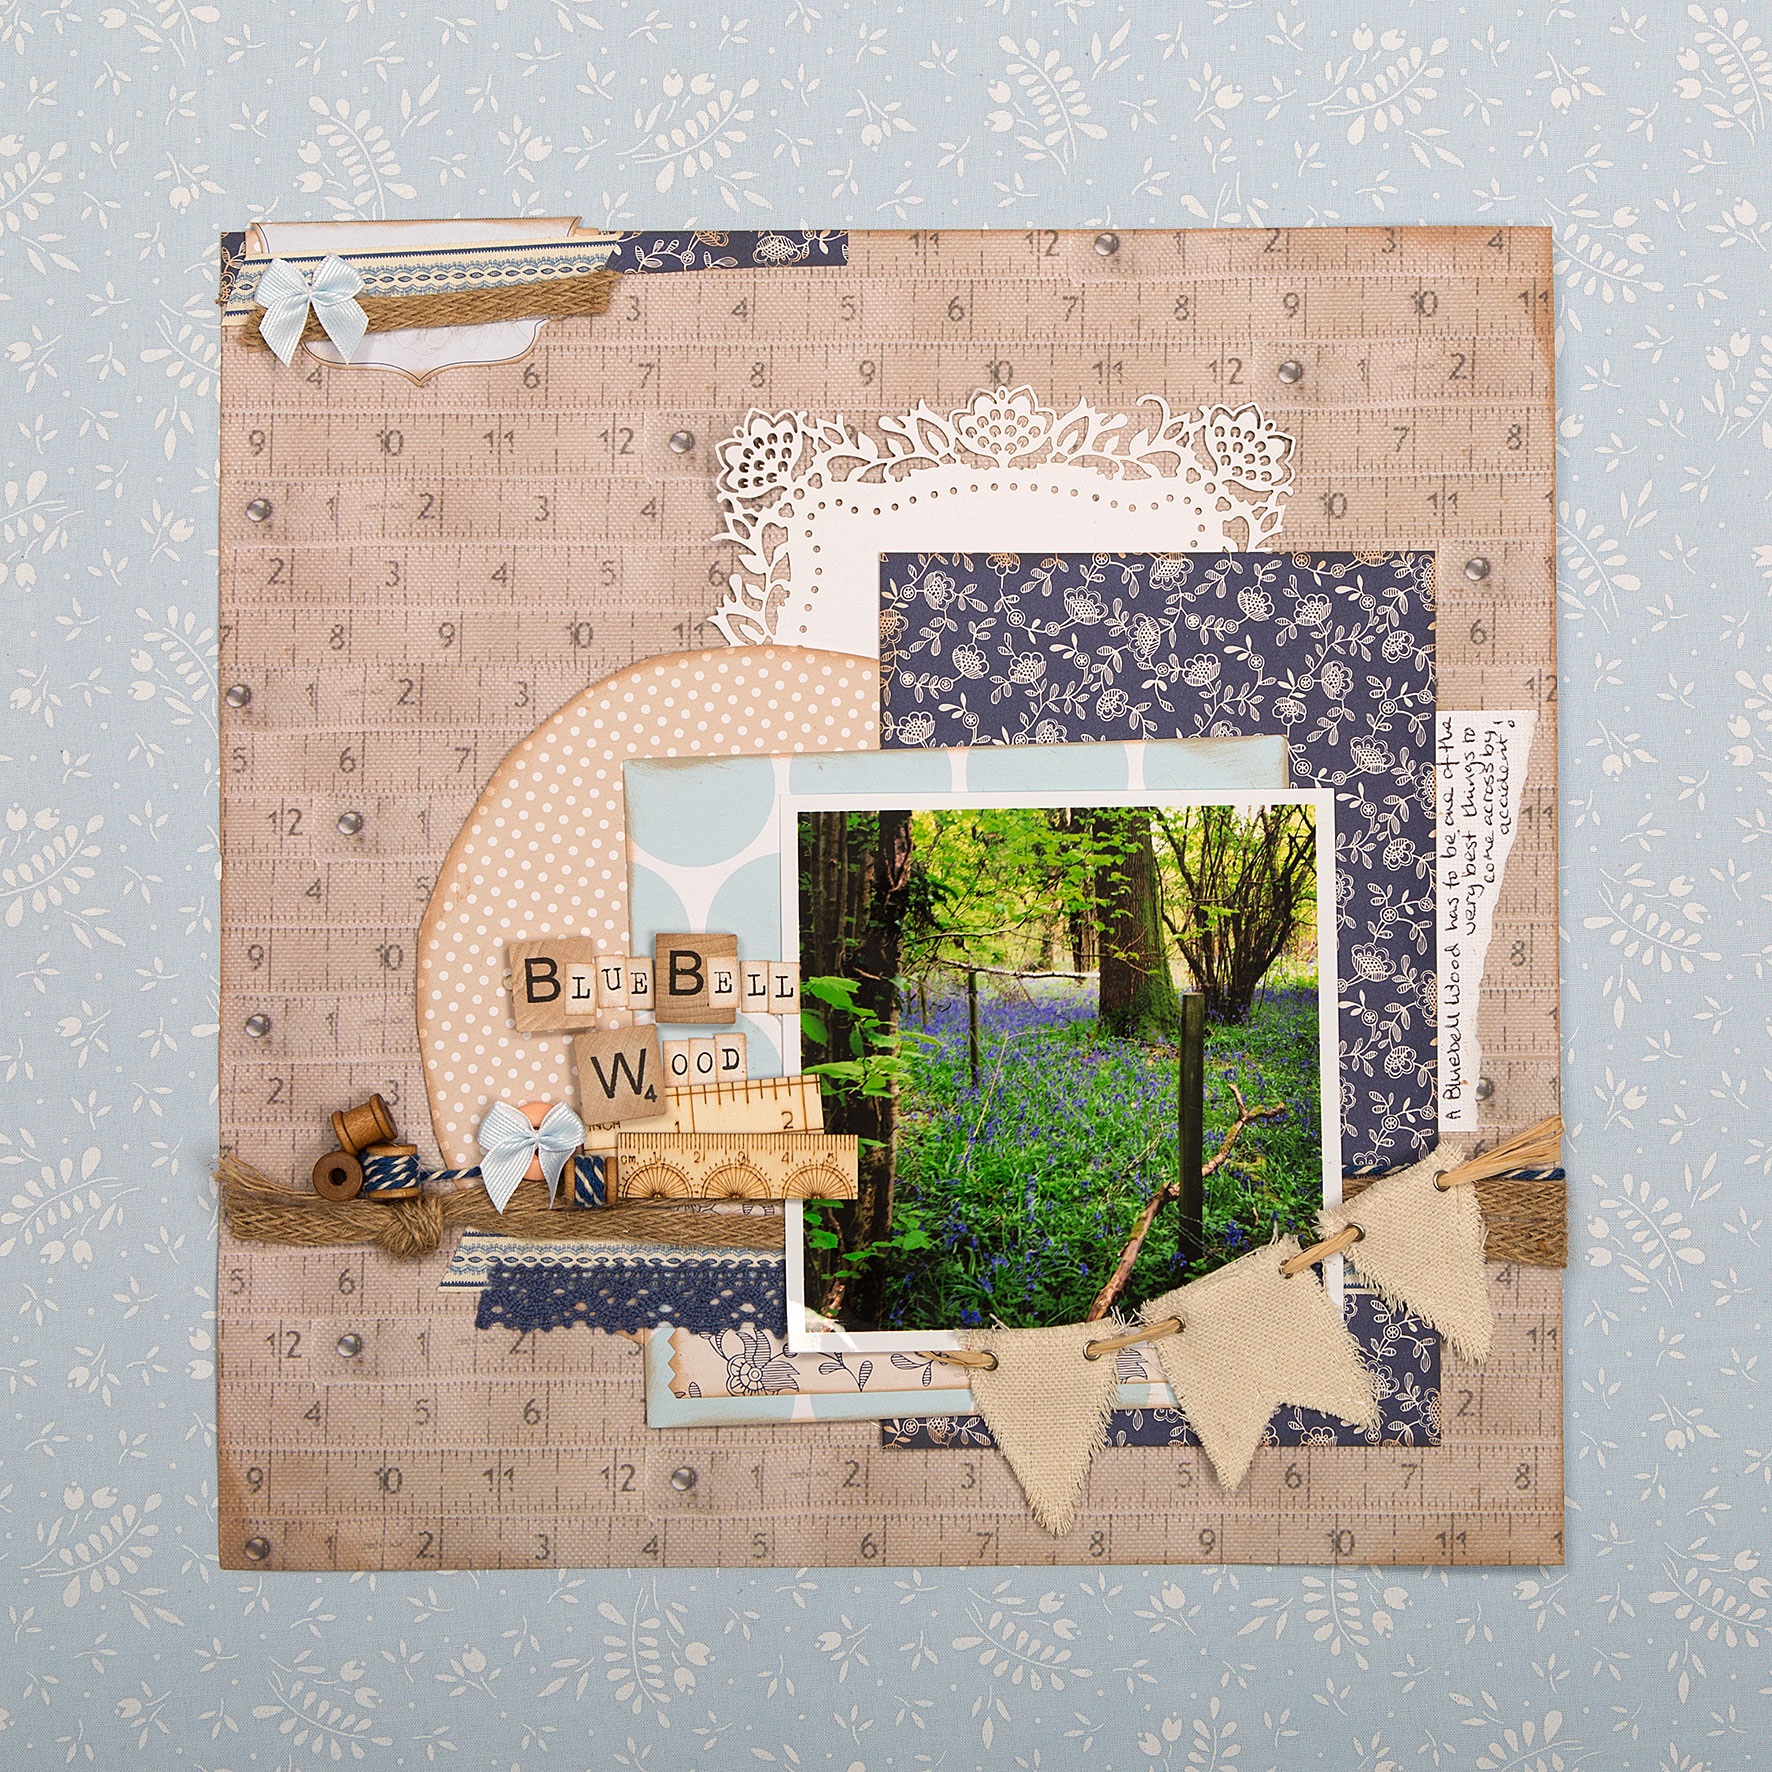
Keeping a white border on your photos lets them stand out on the page, especially when the photo or the background is quite busy.
The Capsule Collection is about those essential elements to all of your favourite collections. Here I’ve used elements of the Pastel Capsule Collection, Sew Lovely and Bare Basics.
By Katy Godbeer
Level: Intermediate
Duration: 45 minutes
You Will Need
PMA 157218 Die-cut Notelets (18pcs) – Capsule Collection – Parisienne Blue
PMA 160165 12 x 12″ Paper Pack (32pk) – Sew Lovely
PMA 160218 8 x 8″ Paper Pack (32pk) – Capsule Collection – Parisienne Blue
PMA 160701 Lace Paper (12pcs) – Capsule Collection – Parisienne Blue
PMA 174408 Canvas Shape with eyelet (6pk) – Bare Basics – Small/Large Flag
PMA 174501 Jute Ribbon (5m) – Bare Basics
PMA 174601 Caption Wooden Letters (30pcs) – Bare Basics
PMA 174602 Wooden Ruler Shapes (6pcs) – Bare Basics
PMA 358301 5m Adhesive Crochet Borders – Capsule Collection – Parisienne Blue
PMA 462205 1m Fabric Tape (3pcs) – Capsule Collection – Parisienne Blue
PMA 804102 Mini Alphabet Stickers (280pcs) – Madame Payraud
GOR 171200 20m Bakers Twine (3pcs) – Gorjuss
PMA 160202 8 x 8″ Paper Pack (32pk) – Capsule – Spots & Stripes Pastels
PMA 1751100 Raffia (50g) – Natural
PMA 367204 Ribbon Bows (20pcs) – Capsule – Spots & Stripes Pastels
Step by Step
1. Using a sheet of the tape measure design paper from Sew Lovely, add rectangles of Parisienne Blue and Pastel capsule collection. Freehand cut a circle of the beige pastel dot paper and tuck behind.
2. Turn over a piece of the Parisienne Blue paper and tuck behind the layers. Glue in place.
3. Trim a strip of coordinating Parisienne Blue paper and cut the left hand edge with pinking shears. Add on top of the Capsule Pastel layer.
4. Knot two pieces of the Jute Ribbon and adhere towards the left hand side of the page with hot glue. Fold the lengths of the ribbons to the reverse of the page on the right hand side and glue in place.
5. Add a length of the adhesive fabric tape below and a scrap of adhesive crochet border on top to the left hand side.
6. Coil blue Baker’s Twine around a mini reel and adhere the reel to the left hand side above the jute ribbon. Adhere the length of twine across the page. Add a couple more reels.
7. Add your photo as shown and add a couple of ruler embellishments to the left hand edge. Add a further wrapped reel, a button and a bow.
8. Add your title using the wooden alphabet tiles for the first letters, with the rest of the word completed with the Mini Alphabet Stickers.
9. Thread canvas mini bunting sections onto raffia. Add to the bottom right hand corner of the photo and tuck the ends under the photo and to the right hand edge of the page.
10. Fold a Parisienne Blue notelet in half and trim away the border. Add scraps of leftover paper, jute ribbon and adhesive fabric tape and adhere to the top left corner of the page. Add a ribbon bow.
11. Add a torn piece of white cardstock to the right hand side of the page and add your journaling.
 docrafts® are responsible for the UK’s leading crafting website www.docrafts.com and Creativity Magazine. They pride themselves on providing an abundance of inspiration, tips, techniques and know-how, covering a wide range of crafts, to enthusiasts across the World. Many of the UK’s leading products and recognized brands such as Papermania, Xcut, Forever Friends™, Me to You™, Boofle™, Anita’s, Craft Planet and Cousin Jewellery come under the docrafts® umbrella.

Leave a Reply
Please login or register to leave a comment.